Review Tosave Water Decals!
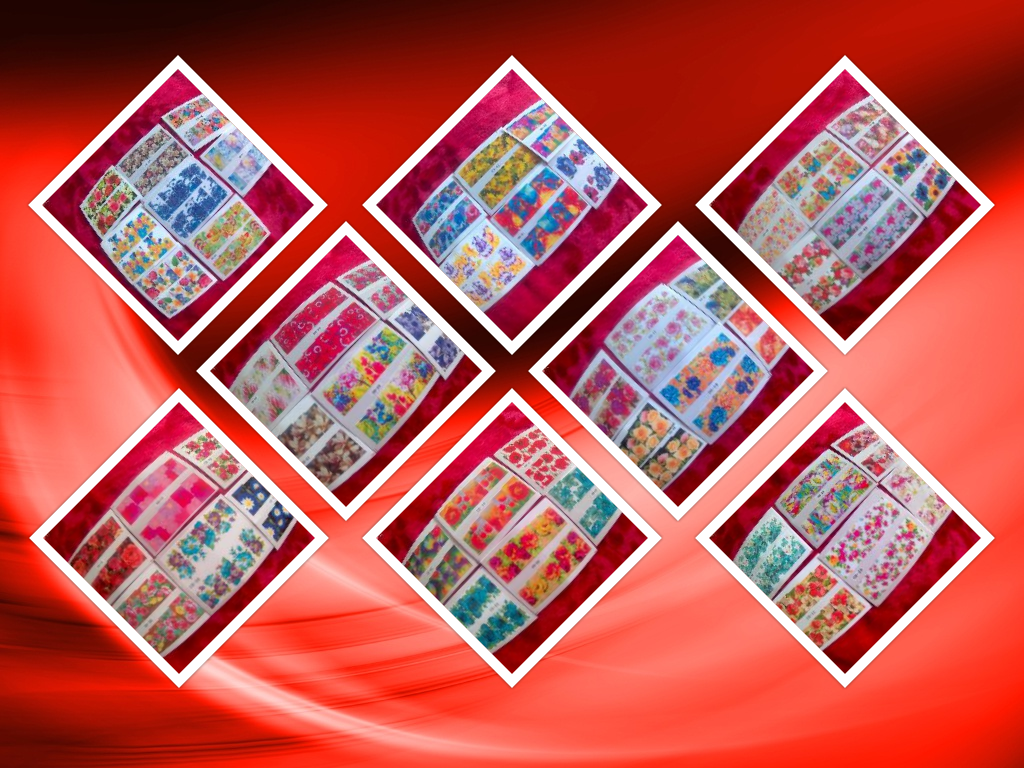
Howdy! Before going to Constanta I decided to make you a surprise: Today we will discuss the most beautiful water decals received from the tosave. If you remember, we’ve talked about this site twice. Last time I introduced you all the water decals, but then I was talking about some small drawings. Now we are talking about larger models that cover the nail entirely. You can see below how the 50 water decal pads look.
What are the steps we must take to enjoy the most beautiful nails made with water decals?
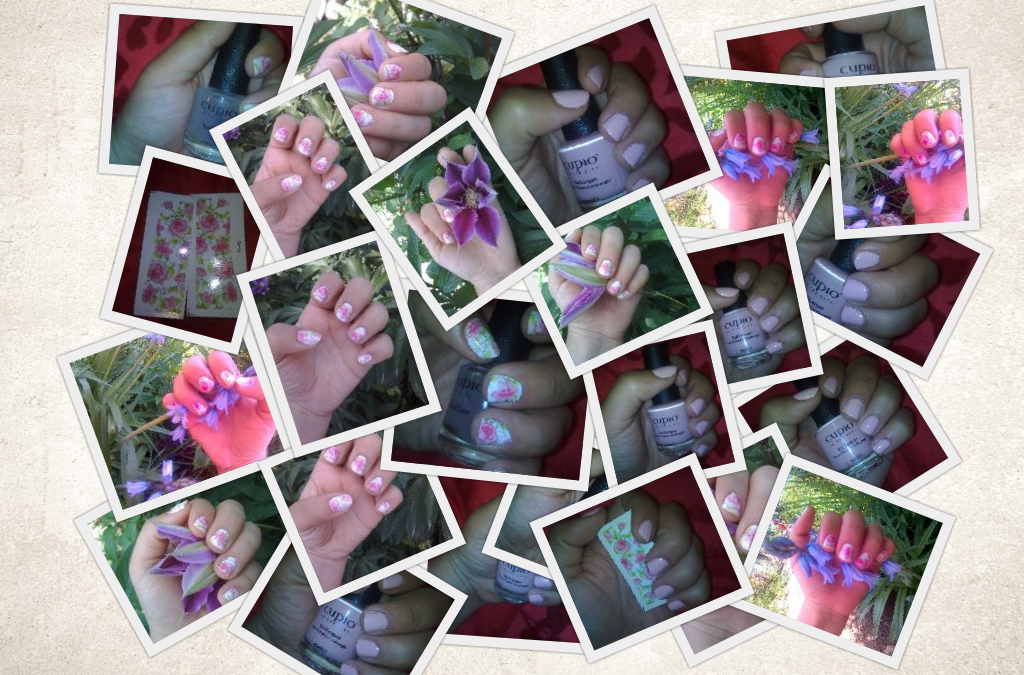
1.We’ll need a nail polish. I recommend you use a color as close as possible to the water decals used. For example, I opted for pink because in places where water decals did not get well it would not be very bad. The nail polish used is found in Cupio.
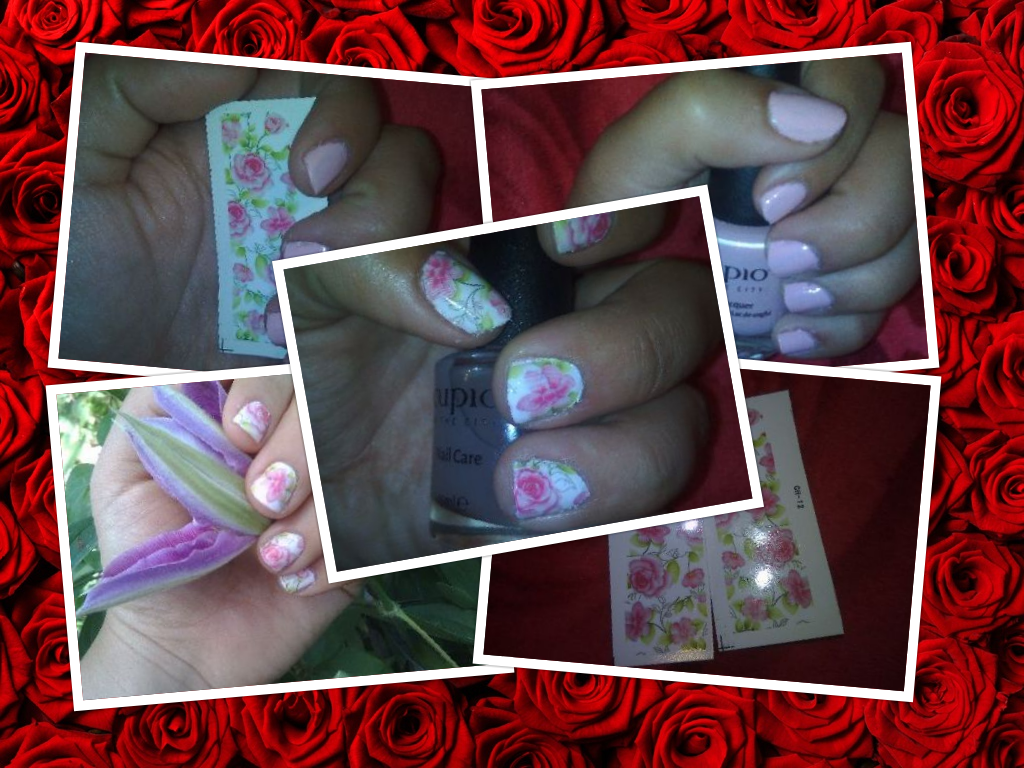
2.Follow the cutting of water decals. These are made to match each nail in particular so try not to mix the pieces between them. It’s not very hard to cut them, if you look carefully you can see where the water decals begin and where they end up.
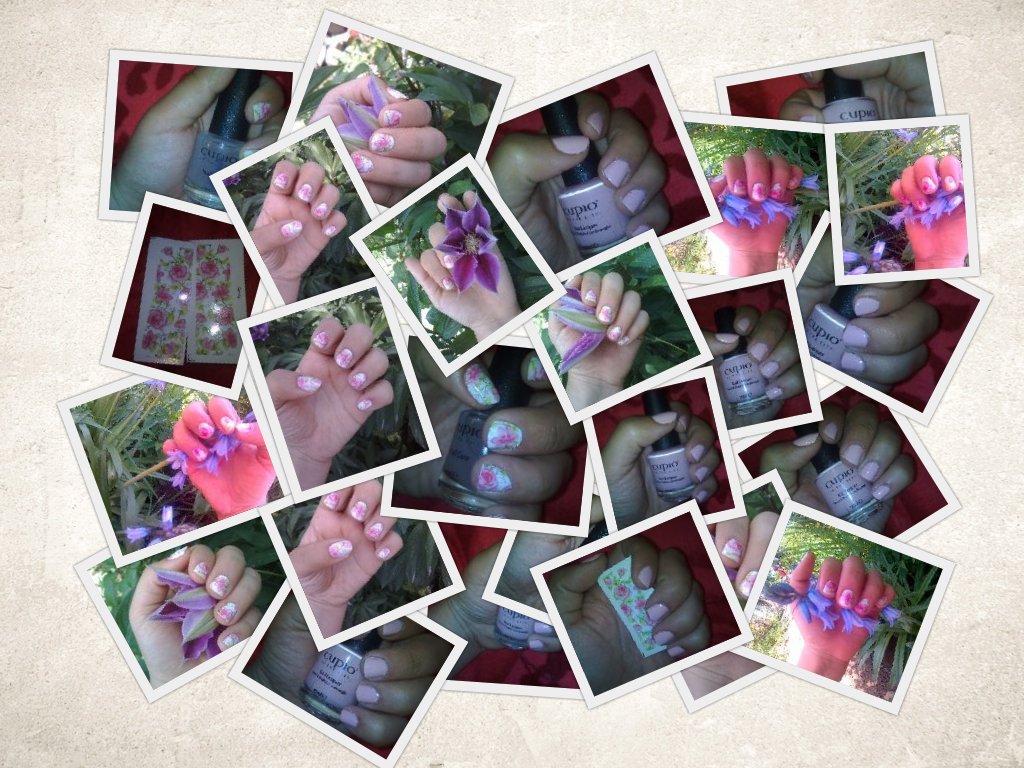
3.In a glass of water at room temperature, put water decals in a row. After a maximum of 20 seconds you can take water decals out of the water and gently with the navel of your finger you can move the side with the water decals on the right nail. Try to work quickly so that it does not dry out and do not put the strobe pattern.
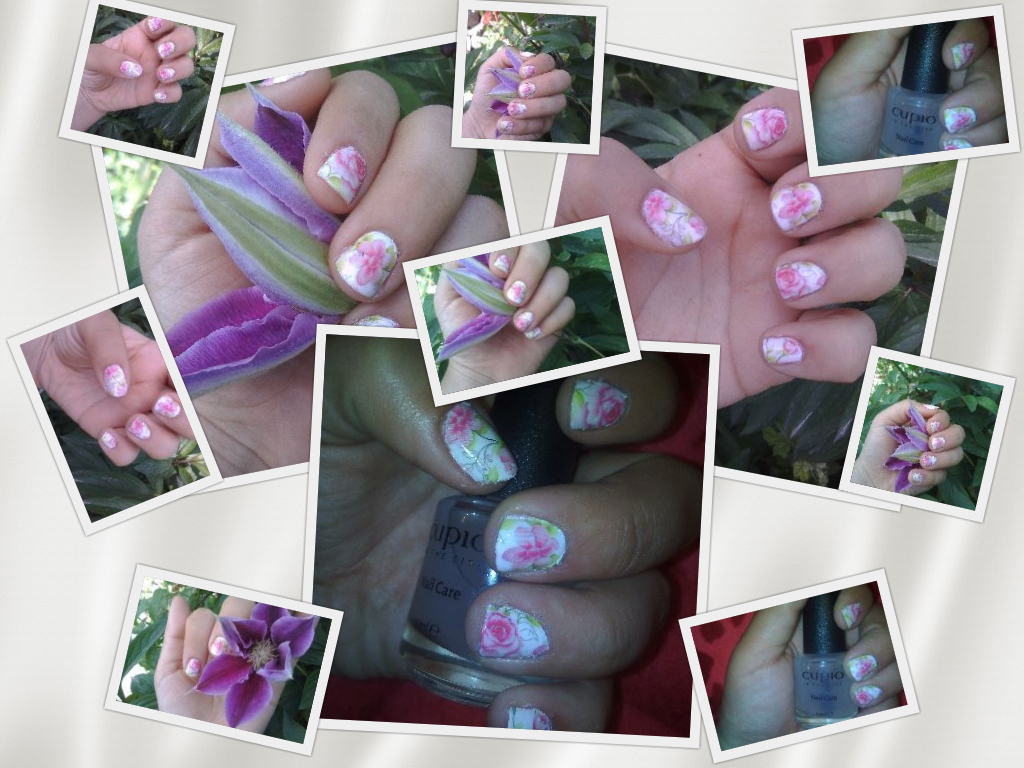
4.With acetone, wipe off the surplus left with water decals. That which I saw is very easy to delete so I do not think there will be problems. You can then use a feeder to dry water decals.
5.Apply a top coat so that the entire manicure lasts longer. I used the top coat from Cupio, but I’m sure you have more options too.
What do you think about these water decals? What models did you conquer? Have you seen what small price are available on the tosave site?